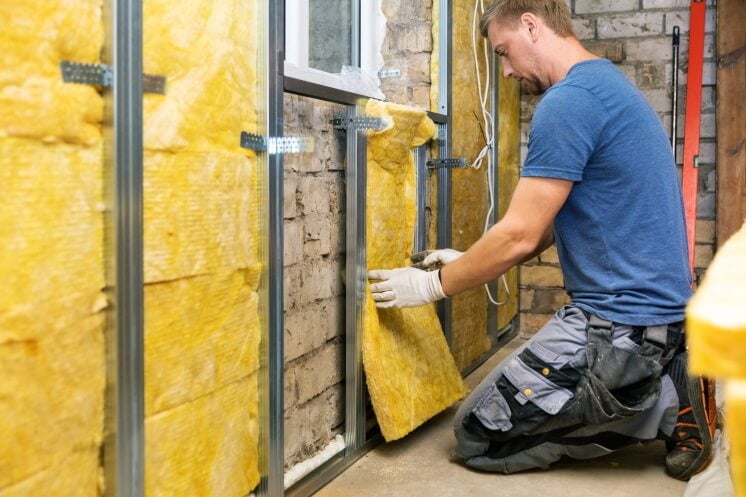
Knauf Insulation is a well-respected and rapidly growing name within the insulation industry offering top quality internal wall insulation products to building slabs, leading the way with products that allow you to make your home more energy efficient and saving you heaps on money on energy bills. One of the best ways to cut down on energy bills is through internal wall insulation. This tremendously reduces the amount of energy used for home heating and cooling purposes. However, though cheaper and effective, internal wall insulation can be quite disruptive since it needs the removal as well as refixing of some items found on the interior face of external walls, including radiators, switches and kitchen units. Due to the fact that it will change the nature of your building, internal wall insulation must be well thought before it is carried out.
The Steps Followed in the Installation of Internal Wall Insulation
We have three main methods through which we can install internal wall insulation. The three options are:
- Insulation of the wall directly
- Insulation with a stud wall
- Fixing insulation with battens
The process followed in the three methods of internal wall insulation is more or less the same. Here is how to go about it.
- Thoroughly inspect the condition of the wall in question and perform any necessary corrective work;
- Inquire from your insulation manufacturer of choice where the dew point is likely to occur with the most appropriate thickness of insulation;
- Choose the most appropriate method of insulation out of the three options;
- Make a decision on how to fix floor voids, reveals, and any other likely cold bridges;
- Get rid of any fixtures on the wall such as light switches, plug sockets, radiators, curtain tracks, skirting’s, pipes, kitchen cabinets, coverings, fitted wardrobes and etcetera;
- Perform all the preparation work on the wall;
- If need be, build a fresh stud wall and/or install the insulation;
- Ensure all joints are sealed as well as skim the plasterboard for finishing;
- Reinstall the wall fixtures such as the light switches, radiators and sockets that you removed.
- Direct Insulation of the Wall
This is the first option for internal wall insulation. In this case the insulation will be directly fixed on the wall, mostly by bonding it to the plasterboard complete with a vapour barrier. This can be a quick and effective method, especially if the wall is fairly flat and in sound condition.
You can directly glue the boards to the wall using an adhesive meant specifically for this purpose. If need be, you may also make use of mechanical fixings such as screws. Fill any gaps existing in between the boards or at the floor edges and ceilings using mastic and tape them over before doing plaster skimming in order to make sure that there is continuity of the vapour barrier. A continuous vapour barrier which is unperforated happens to be the sole effective way to take care of a dew point that is likely to occur in the wall.
- Fixing the Insulation with Battens
Battening the wall is the second option of insulation. You can either fix battens to the wall in order to offer a more even fixing in preparation for the insulation or have the battens fixed over the insulation. The second method is referred to as the “warm batten.” 25x50mm battens would be used in both.
The first option is the most commonly used and, in cases where walls are uneven, it can turn out to be the best choice. Although, the vapour barrier may inevitably be perforated since the insulation is not only rigid but screwed to the battens too.
- Insulation Using a Stud Wall
This is the third option and it happens to be the most acceptable method of internal wall insulation. It is done through construction of a new stud wall, about 100mm thick within the already existing wall, with a cavity of about 50mm between the two.